Saturday, September 29, 2012

Pumpkin Muffins

The weather has started to move into its Autumnal pattern here in Nebraska, and harvest is happening all around us. Fall in our house means the return of pot roast, chili, lasagna, and all of the yummy cool weather baked goods we can handle. This pumpkin muffin recipe is perfect for school days, as they freeze and thaw beautifully, and the kids beg for them!

What you'll need to make 24 muffins:

3 1/2 cups flour (I use 1/2 whole wheat and 1/2 white whole wheat so that they are whole grain, but you can use any kind you prefer)
1/2 cup milled flax seed
2 teaspoons baking soda
2 teaspoons salt
1 teaspoon baking powder
3 teaspoons pumpkin pie spice (or to taste)
2 cups pureed pumpkin (canned or homemade, or you can also sub in sweet potato!)
1 cup sugar (I prefer brown)
1/2 cup applesauce
1 cup fat free vanilla yogurt (or plain yogurt and a teaspoon or so of vanilla)
4 eggs
1 cup raisins, unsweetened coconut flakes, or nuts (omit if you don't like them!)


First, combine the dry ingredients in a large bowl.


 Next, mix in the wet ingredients until well incorporated. The batter will be quite dense, but we can't all be perfect.


Then fold in your raisins, coconut, and/or nuts.


Fill lined muffin cups 2/3 full with batter. If you like your muffins to look pretty, consider sprinkling them with some coconut. Coconut makes me happy.


Bake in an oven preheated to 350 degrees for 16-18 minutes, or until a toothpick inserted in the center comes out clean.


Engage nom.

Wednesday, August 22, 2012

Homemade Christmas: Fleece Knot Blankets

If your family is anything like mine, you love to spend those cold winter evenings snuggled up under a blanket with a bowl of popcorn while watching Cloudy with a Chance of Meatballs. We generally store two blankets in the family room for these occasions, which are supplemented by comforters and quilts that five small Linuses drag from their beds. I don't know about you, but remaking beds isn't usually something I look forward to. This year I decided to make a fleece blanket for each one of the kiddos, with the intention that they will be left in the family room for those snuggly nights. Want to make your own cuddlebug a cozy fleece blankie? Here's what you'll need ...

2 1/2 yards of fleece (patterned, solid, or 1 1/4 yard of each)
Scissors

That's it. Really. Total cost using a 40% off coupon at Hobby Lobby: $12.


First, remove any selvage from your fleece using a pair of sharp scissors. Don't worry if it isn't perfect - this is a super forgiving project!


Next, fold your 2 1/2 yards of fleece in half hamburger style and cut along the fold so that you have two pieces of equal size. If you chose to do two pieces at 1 1/4 yards each, skip this step.


Now, arrange your two pieces of fleece so that the "nice" sides face out, and the "ugly" sides are facing each other. The next step is to cut a 4" square out of both layers, at all four corners.


Then cut 1" wide and 4" deep strips along all four sides, through both layers at the same time. This seems like a daunting task, but don't worry about measuring - the fringe doesn't have to be perfect! I just guesstimate and make adjustments for my lack of depth perception as I go.


And then you simply tie a double knot using both layers of fringe. A lot of knots. I suggest cuing up some My So Called Life reruns and zoning into the tube while completing this step.


VOILA! A super fuzzy, cozy, snuggly buddy blanket! I can't wait to give this fun "beep bot" throw to Dayne for Christmas!


Sunday, July 29, 2012

Get it for Free: Clothes for the Whole Family!!

Today's super saver tip is a GREAT one! Buying clothing for a family of seven seems like it would be an expensive task, but by taking advantage of clearance sales, coupons, and rewards I am able to keep our clothes budget to a minimum. My absolute favorite is Old Navy's smartphone app Snap Appy.

Snap Appy works with the camera on your smartphone (or wifi enabled iPod with a camera) to "snap" pictures of Old Navy logos, and then rewards you with coupons and fashion advice. While the fashion advice is appreciated, it is the coupons that make this app a real winner! You can generally get three coupons every week - $5 off a $25 purchase, $15 off a $75 purchase, and the real deal - $5 off of ANY purchase!! That means that you can score $5 worth of free clothes - EVERY WEEK! If you have multiple devices like I do you can score even more! Occasionally Old Navy will also include a $10 off of any purchase coupon, which is even better!

Old Navy generally has awesome clearance and sale prices, so you should be able to find some real steals. This week I was able to use my phone, my husband's phone, and my iPod to score this adult polo, child's polo, and two pairs of toddler pajamas absolutely free!!

Download the app today and get snapping! 


Wednesday, July 25, 2012

The Honest Company Bargain!

The Honest Company was founded by Jessica Alba in an attempt to provide safe, effective, and stylish products for families with kiddos. They have a wide range of products - diapers, wipes, laundry detergent, dishwasher detergent - and lots more! They offer two options - bundle your products for one low, monthly cost, or pick and choose what you need from their online shop.

Now, here's the deal! Plum District is offering a $40 voucher to The Honest Company for just $20! To make this deal even sweeter, they are offering an additional 20% off using code LONDON20. The voucher you receive will cover the entire cost of one month of the Family Essentials Bundle which includes 5 personal and household care products, or it will cover half the cost of one month of the Diapers Bundle, which includes 6 packs of diapers and 4 packs of baby wipes! If you decide not to purchase a bundle, you can also apply the voucher towards the cost of any items in their online shop.

If you choose to do a bundle, feel comfortable knowing that they have a no-hassle cancellation process. You simply make a quick phone call, and they won't put you through an annoying spiel if you do choose to discontinue receiving their products.

What are you waiting for?! Head on over to Plum District and give The Honest Company a try today!

Saturday, July 21, 2012

Free Christmas Tip #3: Opinion Outpost!

Opinion Outpost is another site that allows you to earn PayPal funds or Amazon gift cards. When you sign up they will send you an email when a study is available for you to participate in. The surveys can last anywhere from a few minutes to a few hours, and the pay off is usually proportionate to the amount of time spent taking the survey. If you stay on top of the surveys they offer it is quite easy to accumulate quite a lot of rewards! I like to do surveys in the evenings after the kids go to bed, but before winding down with a book and conversation with my husband.

Sign up for Opinion Outpost now and start bankrolling those Barbies and Legos!

Tuesday, July 17, 2012

Homemade Cheese Crackers - YUMMO!

There are a few versions of this floating around the net, but I added and changed a few things to suit our tastes. This recipe is awesome for a lot of reasons. First, by making your own snackies versus serving Goldfish, or even the organic bunny shaped crackers, you are eliminating all of those crazy ingredients that you can't pronounce. Everything in this recipe is a pantry staple! Second, this is a chance to bring your kids into the kitchen and get them involved in the process, and interested in the food that they eat. What kiddo can resist tiny cookie cutters?!

Here's what you will need:

1 cup flour (I used white whole wheat)
4 Tbs butter, kept cold and cut into chunks (if using salted butter, omit the salt below)
1 tsp salt
2 cups sharp cheddar or other flavorful cheese, shredded (keep in mind that the more flavorful your cheese choice, the more flavor your crackers will have, so aim for one with a bite!)
1/4 tsp onion powder
1/4 tsp garlic powder
1/2 tsp black pepper
1 tsp baking powder
3-5 Tbs cold water

Preheat oven to 350 degrees. I started with a block of cheese, so I began by shredding my chedda' in the food processor ... (I made a double batch, so keep that in mind when my ingredients look disproportionate to what is written above. Since I have five kids and a snack-obsessed husband, one batch of anything just doesn't cut it!)


Next, set the cheese aside and combine the flour, salt, onion powder, garlic powder, baking powder, and pepper in the bowl of the food processor. Pulse them a few times, just to combine.


Add in the butter and cheese, and pulse the mixture until it resembles coarse crumbs.


Once your mixture is crumbly, add in the water, one tablespoon at a time until the dough forms a ball.


Remove your dough ball from the food processor and wrap it in plastic wrap. Place the dough in the refrigerator to rest for 45 minutes or so (I tossed mine in the freezer for 15 minutes instead. I'm impatient like that.)


Once your dough ball has had a chance to chill, roll the dough out onto a lightly floured surface, until it is approximately 1/8 inch thick.


At this point you can decide what shape you would like for your crackers. If you are working without small helpers you could certainly use a pizza cutter or knife to simply make small squares, similar to a Cheez It. I took the kids to Hobby Lobby and let them choose these fun little cutters.


Bake your shapes on a cookie sheet lined with parchment for 15-25 minutes, depending on the size and shape you chose. The crackers are done when the edges are slightly golden and the crackers are crisp! Allow the little guys to cool, and then store them in a tightly sealed container for up to a week or so.


Our entire family was REALLY impressed with the ease of the recipe, and everyone loves the taste! They have just the right amount of cheesy flavor, and are obsessively snackable!

Sunday, July 15, 2012

Homemade Christmas Gift Idea - Fabric Flower Hair Clips/Bands


 Today I want to share a SUPER simple, but awesome Christmas (or birthday, or any time!) gift idea for the little ladies in your life! These fabric flowers are super popular right now, and sell on Etsy for $10 or more. I am going to show you how to make them for MUCH less, and in only 20 minutes or so.  They are "sew simple", and even older kiddos could make them!

Here's what you'll need:

Fabric (this is a great chance to repurpose some old shirts, curtains, sheets, etc...!!)
Scissors
Needle & thread
Button
Small felt circle
Scissors
Iron


Trace the bottom of a juice glass (or any round object, approximately 3 inches or so in diameter) onto your fabric 5-6 times, depending on the number of petals you would like for your flower. 


Cut around your traced circles, and then iron them flat. Don't worry if they aren't perfect, or even if there is a little ink along the edges. This project is very forgiving! YAY!


 Next, fold the circle in half and iron again...


And again until you have a nicely pressed 1/4 circle.


Continue the process until you have a nice pile of pressed 1/4 circles.


Next, thread your needle and make a running stitch, three or four stitches, along the bottom curve of one of the 1/4 circles of fabric. Don't worry if the stitches are perfect - you won't see them in the end!


Now, pull the thread tight to create your first petal! Wasn't that easy?! Before moving on to your next petal, go back and make one stitch through the base of your petal to secure its shape, as shown below.


Then, grab your next 1/4 circle and make a stitch through the first petal and into the new piece of fabric, securing them together. Continue by again making a few running stitches along the bottom of the new petal, pulling them tight, and then securing the petal.


Repeat the process until you have the number of desired petals for your flower ...


Finally, stitch the last petal to the first, securing your work!


You should now have a pretty flower, with an ugly mess of stitching in the middle.


Hide your work by adding a button to the center of the flower, and stitching it in place!


Affix (stitch or glue) a circle of felt to the back of your flower to cover the mess on the other side.


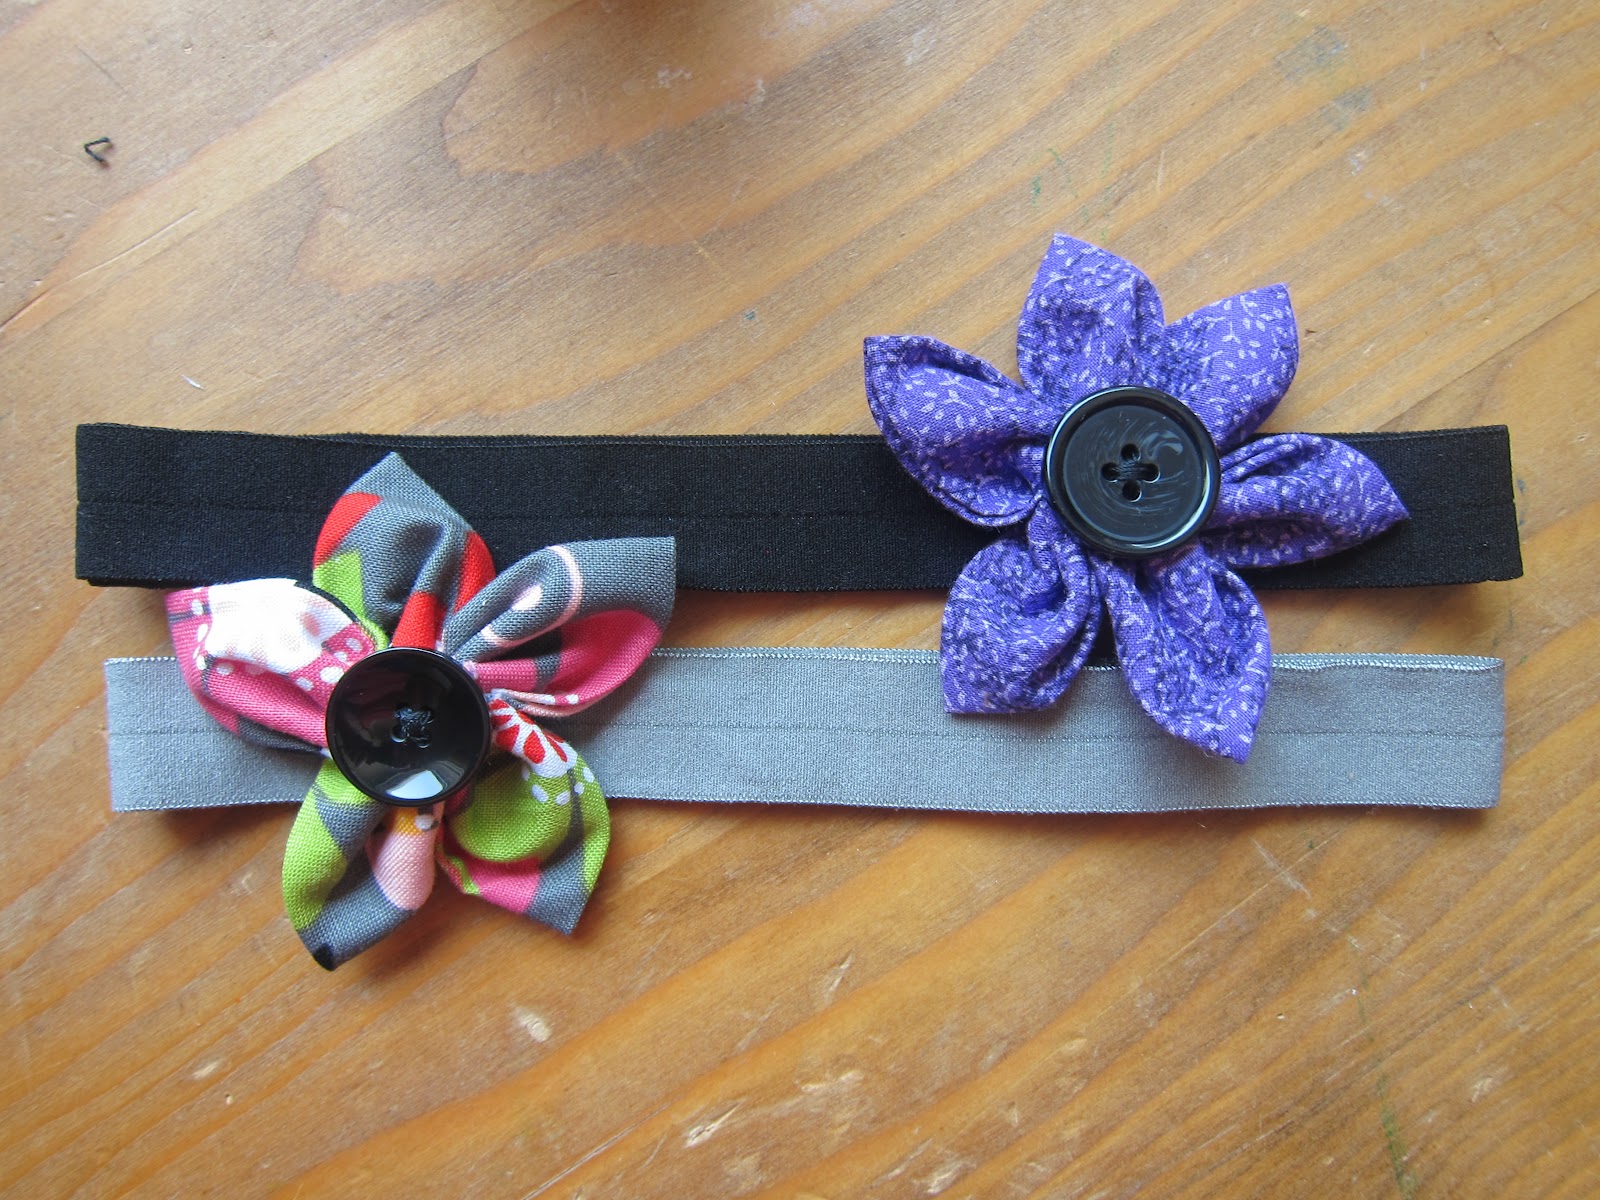
Voila! A super simple, very pretty fabric flower. You can attach them to a hairclip, headband, or even to other crafts like a homemade picture frame or canvas tote bag! I chose to stitch mine to some stretchy headbands. 


The girls love them! We are busy making headbands for all of the little girls in our lives, so if you happen to be the parent of one of my nieces, keep the secret, please!! :-)